How it works
A React HUD reaches the screen in four stages. Each stage is a real boundary you can debug in isolation.
The pipeline
- Blueprint mounts the layer. A BP node —
Add Web HUDfor multi-HUD, orCreate Widget+Add to Viewportfor the widget-first flow — instantiates aUWebHUDLayerwidget and pushes it onto the viewport stack at the chosen anchor and z-order. - CEF loads your URL. The widget hosts a Chromium Embedded Framework (CEF) browser. It navigates to your dev server (default
http://localhost:5173) or the packaged URL configured per-widget. - The bridge injects the JS surface. Before your bundle runs, the plugin injects
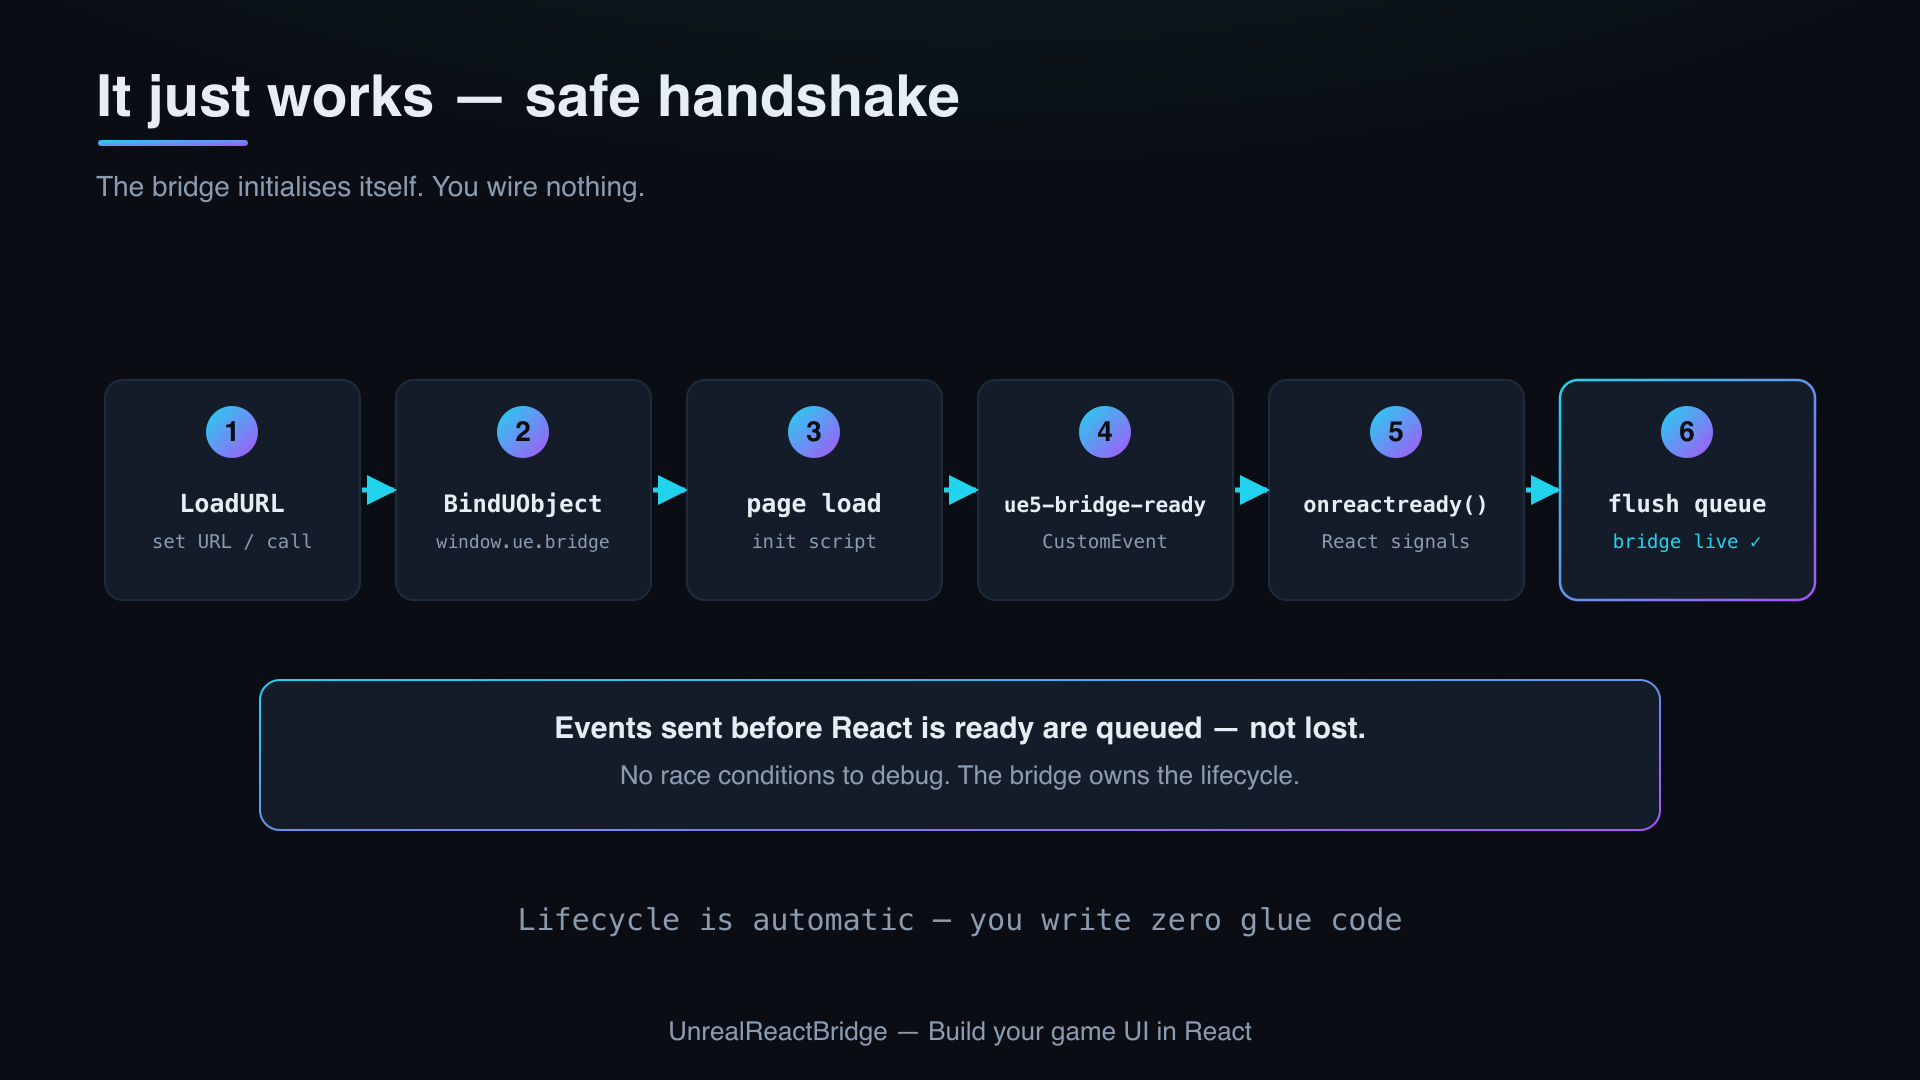
window.ue.bridgeand dispatches aue5-bridge-readyCustomEventonwindow. The React SDK'sUnrealBridgeProviderlistens for this event. - React signals ready, events flow both ways. The SDK calls
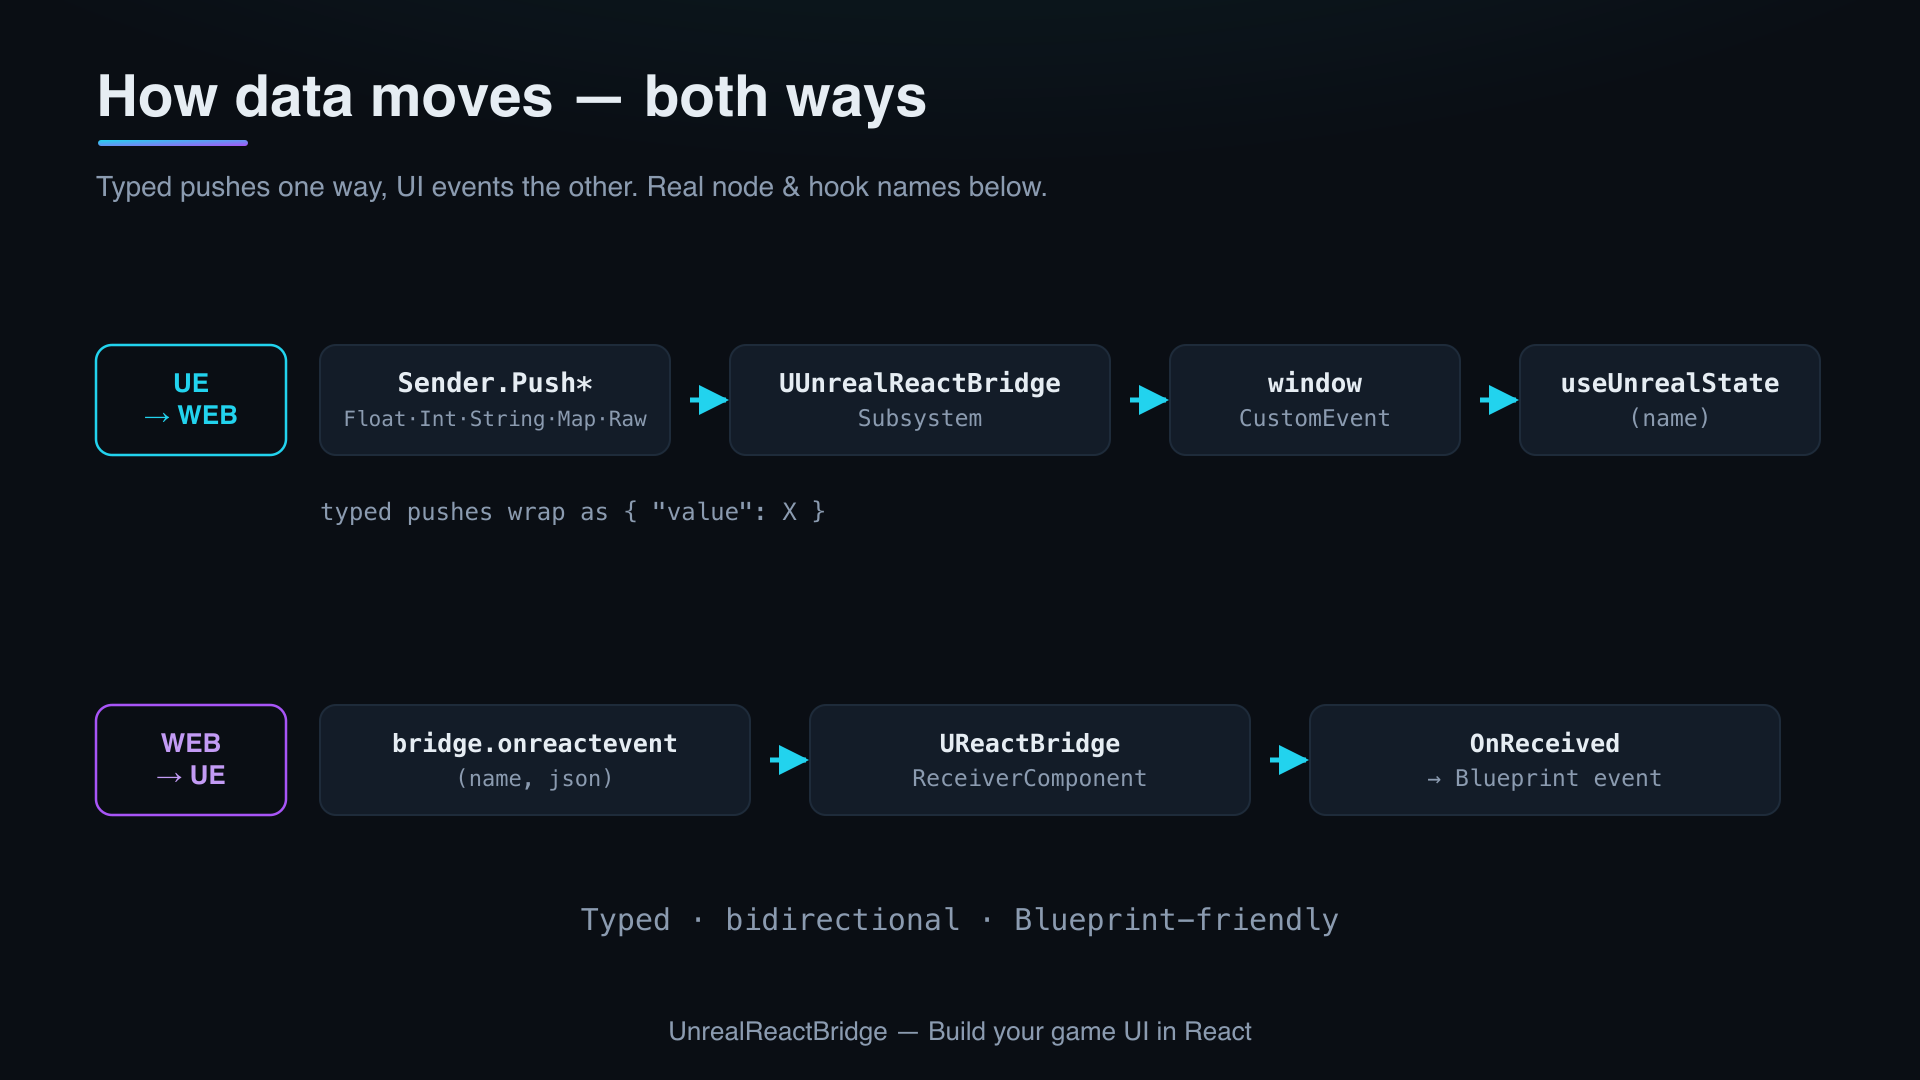
window.ue.bridge.onreactready(). From that moment, BP pushes (PushFloat,PushString, …) arrive as typed React state, and React emits events that surface as BPOnReactEventdispatchers.
The ready queue
Events sent by UE before React calls onreactready are buffered, then flushed in order once the handshake completes. The default queue size is 100 events and is configurable in Project Settings → Plugins → Unreal React Bridge.
Why this matters
You can call PushFloat("Health", 100) from Event BeginPlay without racing the browser boot — the value lands the moment React mounts.
Where to go deeper
- Wire-level event shapes, channel naming, and version negotiation: Bridge Protocol v1.
- BP nodes by category: Web HUD library.
- React-side hooks and provider: UnrealBridgeProvider.